Installation & Activation Guide
How to install & activate Windows 10 Pro
Follow these simple, illustrated steps to get Windows 10 Pro up and running on your PC device. Takes about 10 minutes.
The installation at a glance
STEP 1Download tool
STEP 2Create media
STEP 3Settings ▸ Activation
STEP 4Change key
STEP 5Enter key
STEP 6Activated
Step-by-step instructions
1
Download the Media Creation Tool
Click Download installer below to get the official Media Creation Tool. This is used to install or upgrade Windows from your existing PC.
2
Run the tool to install or upgrade Windows
Launch the tool and follow the prompts to either upgrade this PC now or create installation media (USB/DVD) for a clean install. Accept the licence terms and let it complete.
3
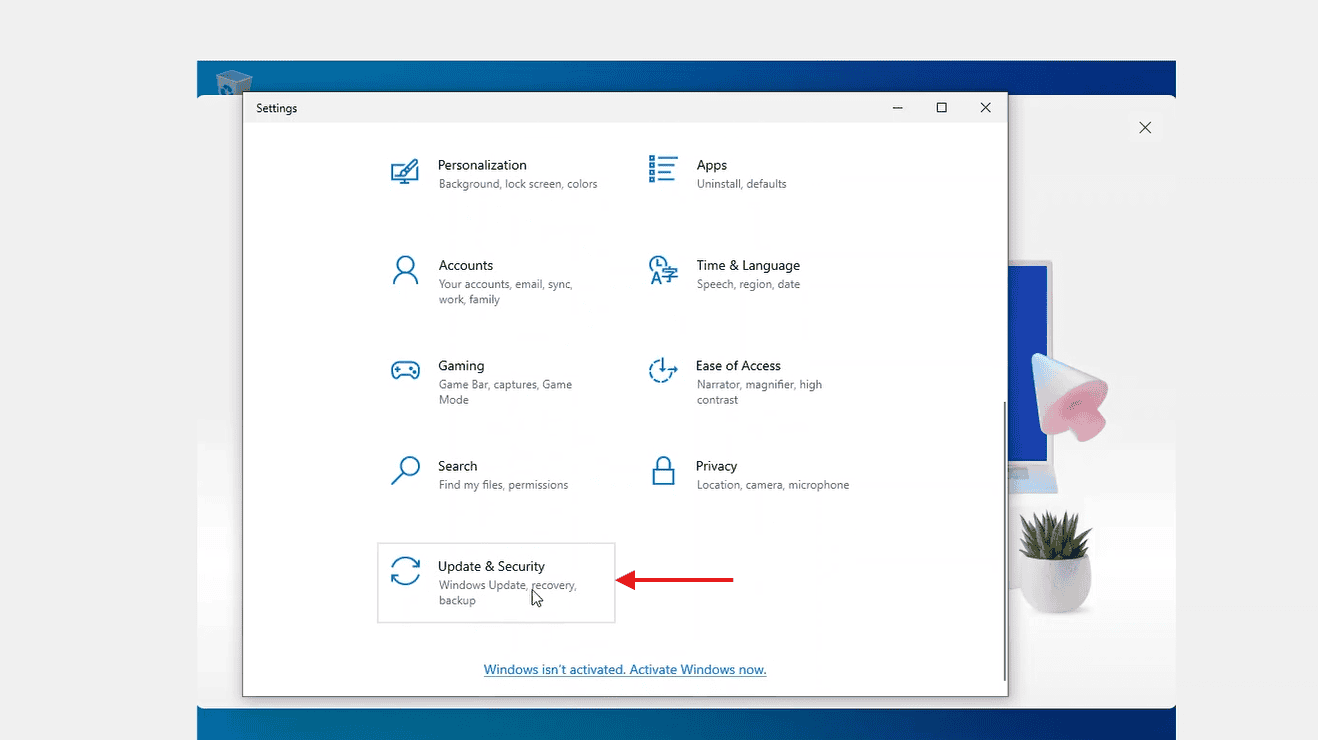
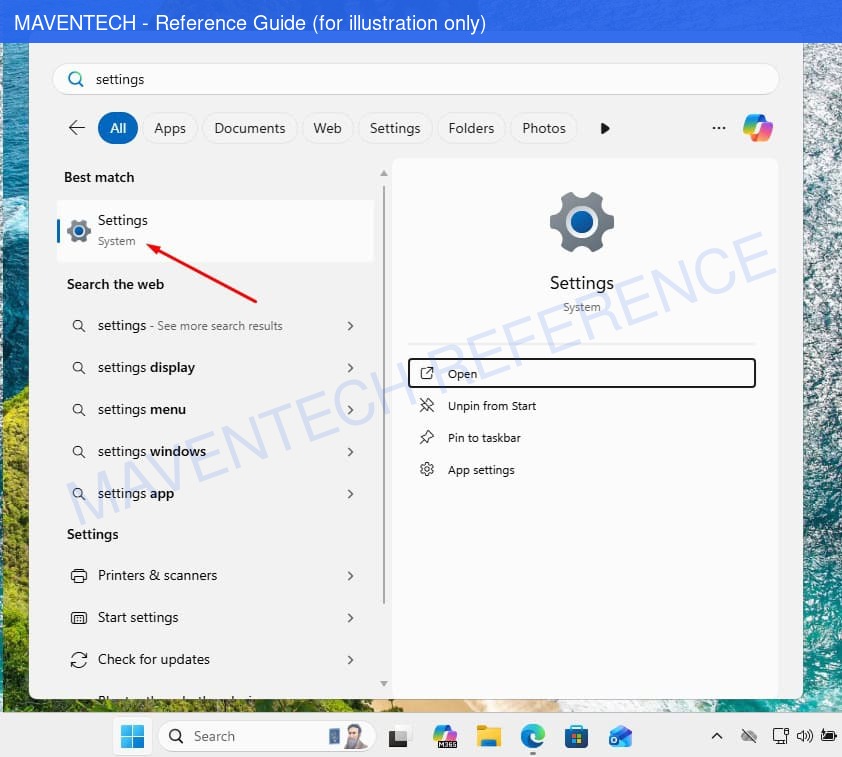
Open Settings → Activation
Once Windows is installed, go to Settings ▸ System ▸ Activation (on Windows 10: Settings ▸ Update & Security ▸ Activation).
4
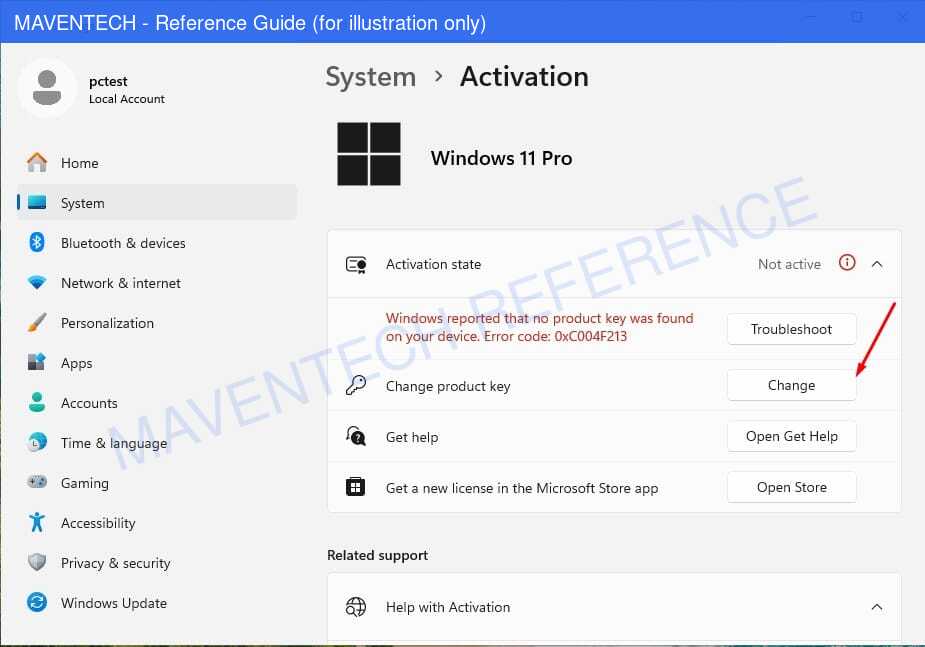
Click "Change product key"
Under the activation panel, choose Change product key to open the key-entry box.
5
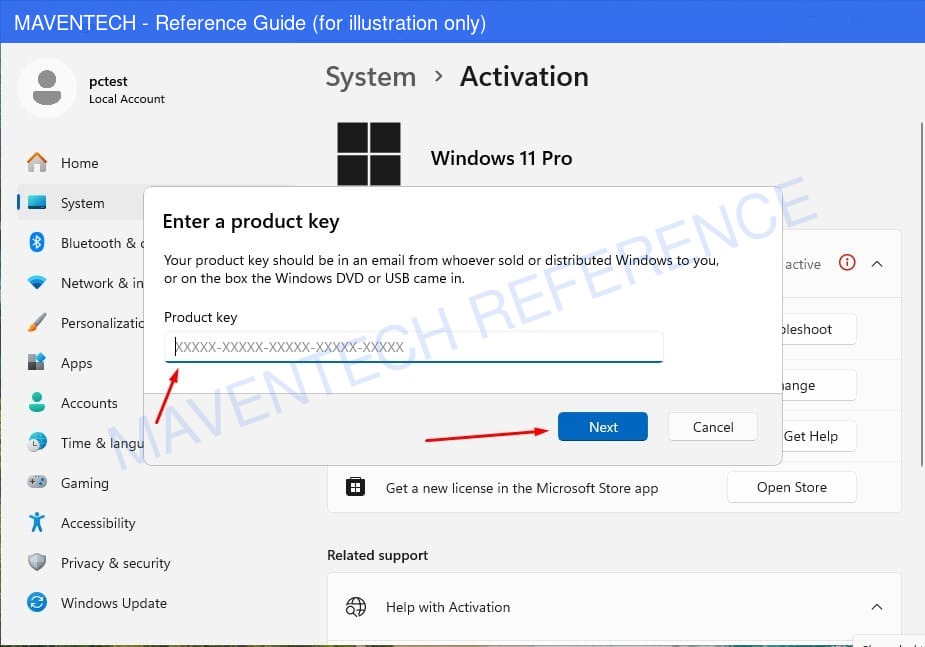
Enter your 25-character key
Type the product key from your order email and click Next, then Activate.
6
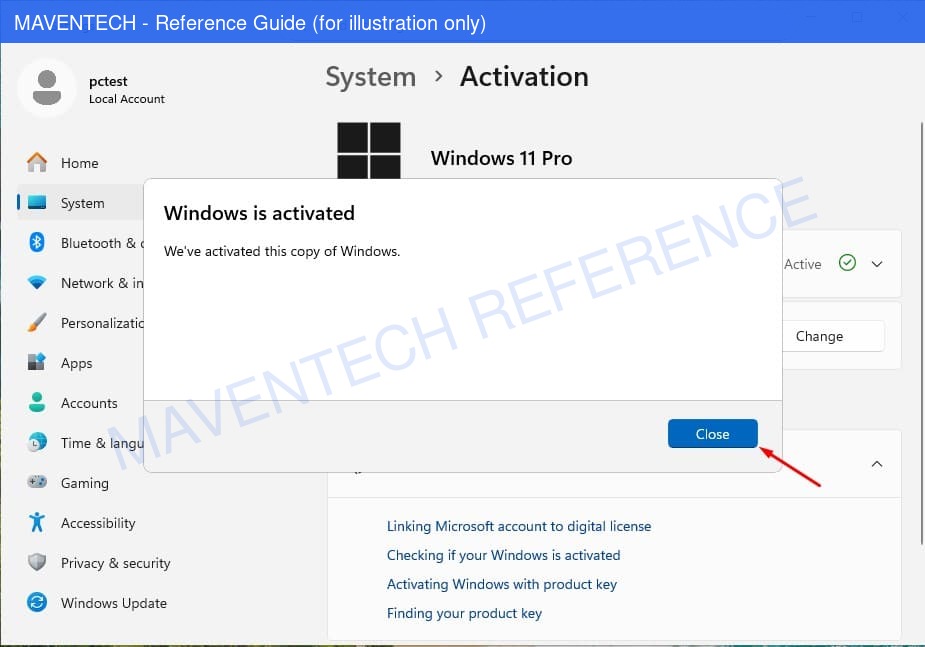
Windows is activated
You’ll see “Windows is activated”. That’s it — your licence is permanent on this device.
System requirements
- 1 GHz or faster compatible 64-bit processor (Windows 11 needs TPM 2.0)
- 4 GB RAM or more
- 64 GB or larger storage device
- A blank USB drive (8 GB+) or DVD if you create installation media
- A stable internet connection
License & activation
Activate from Settings ▸ System ▸ Activation ▸ Change product key as shown above. To make re-installs effortless, sign in with a free Microsoft account at account.microsoft.com so your digital licence is linked to your account.
Stuck on a step?
Our order team can help with license-key delivery and activation questions. Reach us at services@maventechsoftware.com or call 1 (805) 294-1524.
